Bomb Tester Demonstration Kit
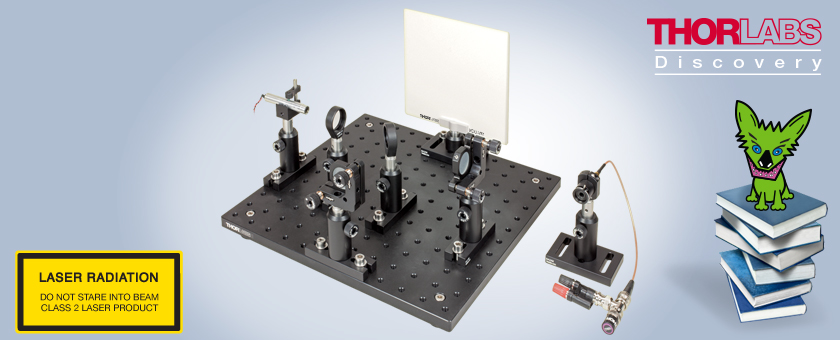
- Designed for Education, Demonstration, and Classroom Use
- Easy-to-Use Kits Include Components Plus Free Educational Materials

Please Wait
Click to Enlarge
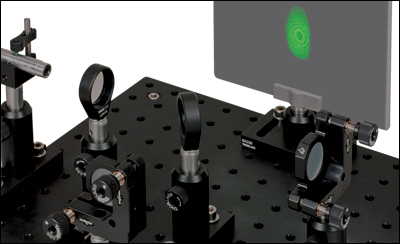
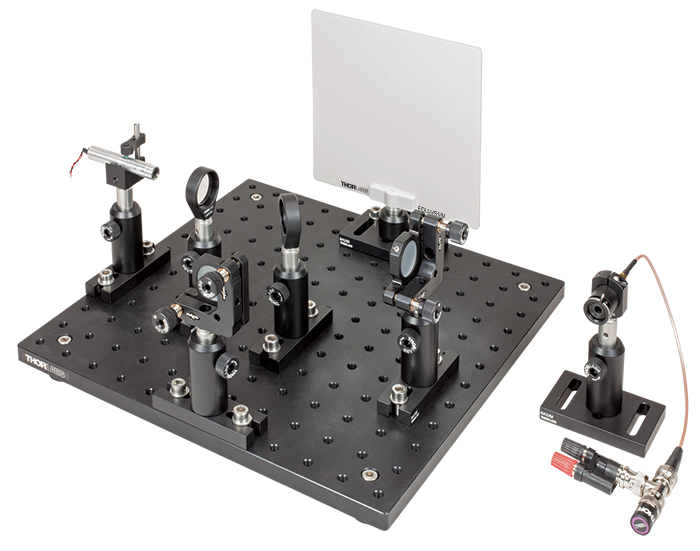
Figure 1.1 Interference fringes produced by the Michelson interferometer can be observed with the viewing screen.
Bomb Tester Analogy Demonstration Kit
- Designed for Educational, Demonstration, and Classroom Use
- Complete Photonics Kit Includes All Hardware Except Voltmeter Plus Extensive Manual and Teaching Materials
- Easy to Assemble and Use
- Choose from Educational Kits Containing Imperial or Metric Components
Experiment
- Photons Create an Interference Pattern in a Michelson Interferometer
- Examines the Principle of Interaction-Free Quantum Measurement
- "Marking" a Photon with Path Information Destroys the Interference Pattern
Thorlabs' Bomb Tester Demonstration Kit uses an analogy experiment to demonstrate the principle of "interaction-free quantum measurement" discussed in the "Bomb Tester" thought experiment (published by Elitzur and Vaidman in 19931). This educational lab kit includes components to build a Michelson Interferometer, a viewing screen to observe the fringes, and a detector to measure changes in intensity of light exiting the interferometer.
Although some of the experiments require the use of a voltmeter, we have not included one with this educational kit since many physics labs are already stocked with them. For customers who would like to purchase a voltmeter to use with the kit, Thorlabs has a digital multimeter available here.
Thorlabs also offers a Michelson Interferometer Demonstration Kit; see the Kit Comparison tab for details.
Thorlabs Educational Products
Thorlabs' line of educational products aims to promote physics, optics, and photonics by covering many classic experiments, as well as emerging fields of research. Each educational kit includes all the necessary components and a manual that contains both detailed setup instructions and extensive teaching materials. These lab kits are being offered at the price of the included components, with the educational materials offered for free. Technical support from our educational team is available both before and after purchase.
Purchasing Note: English and German language manuals/teaching information are available for this product. The imperial educational kit contains the English manual and US-style power cord. The appropriate manual and power cord will be included in the metric kit based on your shipping location. The power supplies and other electronic devices in both the metric and the imperial kit accept voltages of 230 VAC and 120 VAC. Some power supplies include a switch for selecting the mains voltage. See the respective manuals for details. Please contact Tech Support if you need a different language, cord style, or power supply. As with all products on our website, taxes are not included in the price shown below.
1A. Elitzur, L.Vaidman: Quantum mechanical interaction-free measurements, Foundations of Physics 23, 1993, p. 987-997
Bomb Tester Demonstration Kit
The "Bomb Tester" thought experiment demonstrates the principle of interaction-free quantum measurement by proposing a scenario where it is possible to detect the presence of a bomb (triggered by interacting with a photon) without detonating it. Thorlabs' Bomb Tester Demonstration includes a manual which guides students through the thought experiment as well as components and instructions for building an analogy experiment in the classroom.
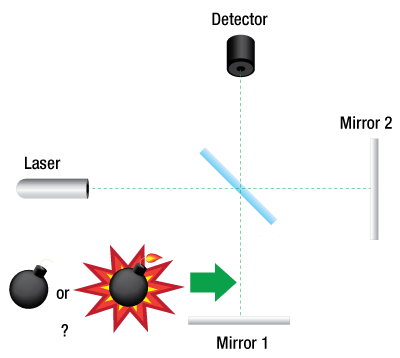
Figure 2.1 Schematic of the Bomb Tester Thought Experiment
Click to Enlarge
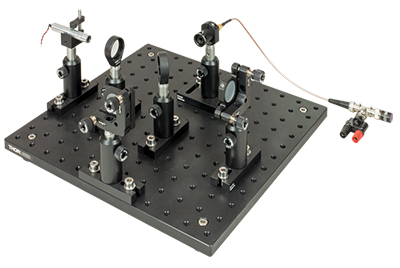
Figure 2.2 Thorlabs' Bomb Tester analogy experiment includes all of the components to assemble a Michelson interferometer. The setup is shown here with the photodetector at the interferometer output. To measure the voltage at the photodetector, a user-supplied voltmeter or multimeter is required.
Bomb Tester Thought Experiment
In a standard Michelson interferometer, light exits a laser and is split into two beams by a beamsplitter. The light then travels down two perpendicular arms of different lengths. Mirrors at the end of each arm reflect the light back to the beamsplitter, where the beams are combined. If the path lengths differ by an integer number of waves, the recombined beams will constructively interfere with each other, creating a bright spot on an observation screen positioned beyond the beamsplitter. Alternatively, if the paths differ by an odd number of half-waves, the two beams will destructively interfere with each other.
Interference experiments can also be performed by passing a single photon through the interferometer, rather than a continuous stream of light. According to quantum mechanics, each photon has two possible states in the interferometer which correspond to the presence of the photon in each arm. The observed interference pattern is created by the superposition of the wavefunctions describing these states. As a result, any photon sent through the system can only reach the screen where the two wave functions do not destructively interfere, i.e. in one of the bright rings observed in the standard experiment when photons pass through the system continuously. If the position on the screen of an individual photon sent through the system is recorded over many trials, the interference pattern will be reproduced.
Finally, consider what will happen to the interference pattern if one of the possible paths the photon can take is "marked." The Heisenberg uncertainty principle predicts that on quantum-mechanical scales, certain pairs of information cannot be known simultaneously. For example, the more precisely the position of a particle is known, the less precisely its momentum can be determined. "Marking" a path through the interferometer provides information about the location of the photon, which will destroy the superposition of states of the wavefunction and erase the interference pattern.
The bomb tester thought experiment examines how these principles can be used to detect the presence of an object without a photon interacting with it. The experiment proposes that there are a certain number of bombs designed to explode after they absorb a photon. Some of the bombs are active, while others are duds. The duds and active bombs cannot be differentiated unless they interact with light. The quantum-mechanics of a "which-path" system can be used to perform this test without detonating all of the active bombs.
To perform the measurement, a Michelson interferometer is aligned so that the interference pattern will have a dark spot at the center and this central minimum is aligned with the input of a detector, instead of a screen. A bomb is placed in one arm of the interferometer and a single photon is passed into the system. If the bomb is a dud, it will not interact with the photon at all. The wavefunctions of the photon in each arm of the interferometer interfere and the photon does not hit the surface of the detector. If the bomb is active, it can interact with the photon. This "marks" the arm of the interferometer containing the bomb, destroying the superposition of states. The photon can be detected by either the bomb or the detector. If the photon interacts with the bomb, then the bomb will detonate. If the photon reaches the detector, we know that the wavefunction collapsed into the arm of the interferometer without the bomb; the absence of detection by the bomb means that the photon must travel in the other arm. Thus, the bombs can be sorted without detonating all of the active bombs.
Thorlabs Analogy Experiment
Thorlabs' "Bomb Tester" analogy experiment uses a Michelson interferometer. The kit includes all of the components to build the interferometer setup, as well as a viewing screen and photodetector. In the analogy experiment, a continuous green laser source is used instead of a single photon source.
The interferometer is set so that destructive interference occurs at the center of the interference pattern and the detector is placed at this location. The scenario with a "dud" is simulated by keeping both of the interferometer arms free from obstruction and the voltage readout from the detector is recorded with a user-supplied voltmeter or multimeter, such as our DVM1 digital multimeter. Next, one arm of the interferometer is blocked to simulate the active bomb and a second measurement is taken. Cut-out figures are included in the manual as visual representations of the "dud" and the active bomb. As in the thought experiment, the light at the detector increases when an object is placed in one arm of the detector since the interference pattern has been destroyed. The fraction of the total power detected when one arm of the interferometer is blocked represents the probability of detecting a photon when an active bomb is placed in the setup.
| Table 3.1 Included Components | ||
|---|---|---|
| Item # | Description | Qty. |
| CPS532-C2 | Green Laser Module | 1 |
| DS5 | 5 VDC Power Supply with USB Type-A Port |
1 |
| CPSA | USB 2.0 to 2.5 mm Phono Cable | 1 |
| VC1 (VC1/M) |
Small V-Clamp | 1 |
| LB1901 | Ø1" Bi-Convex Lens, 75 mm Focal Length |
1 |
| LMR1 (LMR1/M) |
Ø1" Fixed Lens Mount | 2 |
| SM1RR | SM1 Retaining Ring | 1 |
| EBS1 | Ø1" 50:50 Beamsplitter | 1 |
| ME1-G01 | Ø1" Protected Aluminum Mirror | 2 |
| KM100 | Ø1" Adjustable Mirror Mount | 2 |
| EDU-VS1 (EDU-VS1/M) |
Viewing Screen | 1 |
| SM05D5 | Internally SM05-Threaded Lever Actuated Iris Diaphragm | 1 |
| SM05M10 | 1" Long SM05 Lens Tube | 1 |
| SM05PD1A | Silicon Photodiode, 350 - 1100 nm (Inside Lens Tube) |
1 |
| SM05RC (SM05RC/M) |
Ø1/2" Slim Slip Ring | 1 |
| CA2812 | 12" Long Coaxial Cable | 1 |
| T3285 | BNC T-Adapter | 1 |
| FT104 | 100 k? Fixed BNC Terminator | 1 |
| T1452 | BNC Female to Binding Post | 1 |
| TR2 (TR50/M) |
Ø1/2" (Ø12.7 mm) Mounting Post, 2" (50 mm) Long |
6 |
| PH2 (PH50/M) |
Ø1/2" (Ø12.7 mm) Postholder, 2" (50 mm) Long |
6 |
| TR075 (TR20/M) |
Ø1/2" (Ø12.7 mm) Mounting Post, 3/4" (20 mm) Long |
1 |
| PH1 (PH20/M) |
Ø1/2" (Ø12.7 mm) Postholder, 1" (20 mm) Long |
1 |
| BA1 (BA1/M) |
Mounting Base, 1" x 3" x 3/8" (25 mm x 58 mm x 10 mm) |
5 |
| BA2 (BA2/M) |
Mounting Base, 2" x 3" x 3/8" (50 mm x 75 mm x 10 mm) |
2 |
| MB12 (MB3030/M) |
Aluminum Breadboard, 12" x 12" (30 cm x 30 cm) |
1 |
| RDF1 | Rubber Breadboard Feet | 4 |
Bomb Tester Kit Components
Mouse over the photo to see the corresponding components in Table 3.1.
The Thorlabs Bomb Tester demonstration kit has been carefully engineered to be easy to set up and to give clear, reliable results. The kit contains many stock Thorlabs components, making it possible to expand the scope of the experiment by purchasing additional components. To perform the experiment using the included photodetector instead of the screen, a user-supplied voltmeter or multimeter, such as our DVM1, is required. We also recommend purchasing our SPW606 spanner wrench for mounting optics into the LMR1 optic mounts included with this kit.
Purchasing Note: English and German language manuals/teaching information are available for this product. The imperial kit contains the English manual and US-style power cord. The appropriate manual and power cord will be included in the metric kit based on your shipping location. Please contact Tech Support if you need a different language, cord style, or power supply. As with all products on our website, taxes are not included in the price shown below.
Imperial Kit: Included Hardware and Screws
| Item # | Description | Qty. |
|---|---|---|
| BD-3/16L | 1/4"-20 Ball Driver | 1 |
| - | 5/64" Hex Key | 1 |
| - | 3/32" Hex Key | 1 |
| - | 1/8" Hex Key | 1 |
| SH25S075a | 1/4"-20 x 3/4" Long Cap Screw | 4 |
| SH25S038a | 1/4"-20 x 3/8" Long Cap Screw | 1 |
| - | 1/4"-20 x 1/2" Long Cap Screw | 6 |
| SH25S063a | 1/4"-20 x 5/8" Long Cap Screw | 12 |
| - | 1/4"-20 Nut | 4 |
| W25S050b | 1/4" Washer | 12 |
Metric Kit: Included Hardware and Screws
| Item # | Description | Qty. |
|---|---|---|
| BD-5ML | M6 Ball Driver | 1 |
| - | 2 mm Hex Key | 1 |
| - | 3 mm Hex Key | 1 |
| SH6MS20a | M6 x 20 mm Long Cap Screw | 4 |
| SH6MS10a | M6 x 10 mm Long Cap Screw | 1 |
| SH6MS12a | M6 x 12 mm Long Cap Screw | 6 |
| SH6MS16a | M6 x 16 mm Long Cap Screw | 12 |
| - | M6 x 1.0 Nut | 4 |
| - | M6 Washer | 12 |
Interferometer Demonstration Kit Comparison
Thorlabs offers three demonstration kits that make use of an interferometry setup. Each kit is designed to target a different topic and includes accessories to support the experiments described in the kit manual. The EDU-MINT2 interferometer kit is designed to explore the experimental uses of a Michelson Interferometer, while the EDU-BT1 and EDU-QE1 analogy demonstrations are designed to explore concepts in quantum mechanics. Due to the nature of the experiments in the EDU-MINT2 kit, an intrinsically damped breadboard is included to minimize vibrations as students interact with the setup. This added feature supports some of the more challenging experiments, especially the wavelength measurement and white light interference exercises. The other two demonstration kits are built on lighter, aluminum breadboards as the experiments outlined in these kits require less interaction with the setups and vibration is therefore less of an issue. Table 4.1 outlines the key features and educational topics addressed by each kit to aid in choosing the best option for your classroom.
| Table 4.1 Kit Comparison | |||
|---|---|---|---|
| Interferometer Type | Michelson | Mach-Zehnder | |
| Kit Item # | EDU-MINT2(/M) | EDU-BT1(/M) | EDU-QE1(/M) |
| Description | Michelson Interferometer Demonstration Kit | "Bomb Tester" Demonstration Kit | Quantum Eraser Demonstration Kit |
| Kit Photo (Click to Enlarge) |
 |
 |
 |
| Underlying Concept | Use a Michelson Interferometer as a Sensitive Instrument for Measuring Physical Properties |
Explore the "Bomb Tester" Thought Experiment with an Analogy Demonstration |
Explore the Dual Particle/Wave Nature of Light with an Analogy Demonstration |
| Light Sources | Laser (Class 2), Red LED, White LED | Laser (Class 2) | Laser (Class 2) |
| Breadboard | Steel Breadboard, 12" x 18" (30 cm x 45 cm) with Intrinsic Damping to Decrease the Effect of Vibrations |
Aluminum Breadboard, 12" x 12" (30 cm x 30 cm) | Aluminum Breadboard, 18" x 24" (45 cm x 60 cm) |
| Other Accessories |
Additional Beamsplitter to Observe Second Interferometer Output Plexiglas® Plates and Rotation Mount for Refractive Index Measurements Aluminum Rod, Heater, and Thermometer for Thermal Expansion Coefficient Measurement |
Detector for Measuring the Probability of Different States in the Analogy Experiment |
Polarizers to Observe the Effect of Polarization on the Interference Pattern |
| Educational Aspects |
|
|
|
Kit Conversion
Converting the EDU-MINT2(/M) kit to enable the demonstrations outlined in the EDU-BT1(/M) manual is simple; only a photodetector and the necessary mounting hardware are needed.
We cordially thank Antje Bergmann and Pascal Kuhn (Karlsruhe Institute of Technology) for their prototype of a bomb tester setup.
Do you have ideas for an experiment that you would like to see implemented in an educational kit? Contact us at techsupport@thorlabs.com; we'd love to hear from you.
Laser Safety and Classification
Safe practices and proper usage of safety equipment should be taken into consideration when operating lasers. The eye is susceptible to injury, even from very low levels of laser light. Thorlabs offers a range of laser safety accessories that can be used to reduce the risk of accidents or injuries. Laser emission in the visible and near infrared spectral ranges has the greatest potential for retinal injury, as the cornea and lens are transparent to those wavelengths, and the lens can focus the laser energy onto the retina.
Safe Practices and Light Safety Accessories
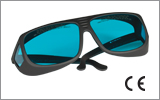
- Laser safety eyewear must be worn whenever working with Class 3 or 4 lasers.
- Regardless of laser class, Thorlabs recommends the use of laser safety eyewear whenever working with laser beams with non-negligible powers, since metallic tools such as screwdrivers can accidentally redirect a beam.
- Laser goggles designed for specific wavelengths should be clearly available near laser setups to protect the wearer from unintentional laser reflections.
- Goggles are marked with the wavelength range over which protection is afforded and the minimum optical density within that range.
- Laser Safety Curtains and Laser Safety Fabric shield other parts of the lab from high energy lasers.
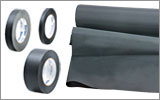
- Blackout Materials can prevent direct or reflected light from leaving the experimental setup area.
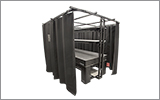
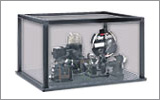
- Thorlabs' Enclosure Systems can be used to contain optical setups to isolate or minimize laser hazards.
- A fiber-pigtailed laser should always be turned off before connecting it to or disconnecting it from another fiber, especially when the laser is at power levels above 10 mW.
- All beams should be terminated at the edge of the table, and laboratory doors should be closed whenever a laser is in use.
- Do not place laser beams at eye level.
- Carry out experiments on an optical table such that all laser beams travel horizontally.
- Remove unnecessary reflective items such as reflective jewelry (e.g., rings, watches, etc.) while working near the beam path.
- Be aware that lenses and other optical devices may reflect a portion of the incident beam from the front or rear surface.
- Operate a laser at the minimum power necessary for any operation.
- If possible, reduce the output power of a laser during alignment procedures.
- Use beam shutters and filters to reduce the beam power.
- Post appropriate warning signs or labels near laser setups or rooms.
- Use a laser sign with a lightbox if operating Class 3R or 4 lasers (i.e., lasers requiring the use of a safety interlock).
- Do not use Laser Viewing Cards in place of a proper Beam Trap.
Laser Classification
Lasers are categorized into different classes according to their ability to cause eye and other damage. The International Electrotechnical Commission (IEC) is a global organization that prepares and publishes international standards for all electrical, electronic, and related technologies. The IEC document 60825-1 outlines the safety of laser products. A description of each class of laser is given below:
| Class | Description | Warning Label |
|---|---|---|
| 1 | This class of laser is safe under all conditions of normal use, including use with optical instruments for intrabeam viewing. Lasers in this class do not emit radiation at levels that may cause injury during normal operation, and therefore the maximum permissible exposure (MPE) cannot be exceeded. Class 1 lasers can also include enclosed, high-power lasers where exposure to the radiation is not possible without opening or shutting down the laser. |  |
| 1M | Class 1M lasers are safe except when used in conjunction with optical components such as telescopes and microscopes. Lasers belonging to this class emit large-diameter or divergent beams, and the MPE cannot normally be exceeded unless focusing or imaging optics are used to narrow the beam. However, if the beam is refocused, the hazard may be increased and the class may be changed accordingly. |  |
| 2 | Class 2 lasers, which are limited to 1 mW of visible continuous-wave radiation, are safe because the blink reflex will limit the exposure in the eye to 0.25 seconds. This category only applies to visible radiation (400 - 700 nm). |  |
| 2M | Because of the blink reflex, this class of laser is classified as safe as long as the beam is not viewed through optical instruments. This laser class also applies to larger-diameter or diverging laser beams. |  |
| 3R | Class 3R lasers produce visible and invisible light that is hazardous under direct and specular-reflection viewing conditions. Eye injuries may occur if you directly view the beam, especially when using optical instruments. Lasers in this class are considered safe as long as they are handled with restricted beam viewing. The MPE can be exceeded with this class of laser; however, this presents a low risk level to injury. Visible, continuous-wave lasers in this class are limited to 5 mW of output power. |  |
| 3B | Class 3B lasers are hazardous to the eye if exposed directly. Diffuse reflections are usually not harmful, but may be when using higher-power Class 3B lasers. Safe handling of devices in this class includes wearing protective eyewear where direct viewing of the laser beam may occur. Lasers of this class must be equipped with a key switch and a safety interlock; moreover, laser safety signs should be used, such that the laser cannot be used without the safety light turning on. Laser products with power output near the upper range of Class 3B may also cause skin burns. |  |
| 4 | This class of laser may cause damage to the skin, and also to the eye, even from the viewing of diffuse reflections. These hazards may also apply to indirect or non-specular reflections of the beam, even from apparently matte surfaces. Great care must be taken when handling these lasers. They also represent a fire risk, because they may ignite combustible material. Class 4 lasers must be equipped with a key switch and a safety interlock. |  |
| All class 2 lasers (and higher) must display, in addition to the corresponding sign above, this triangular warning sign. |  |
|
| Posted Comments: | |
| No Comments Posted |
 Products Home




 Bomb Tester Demonstration